


Creating the perfect apex is a fundamental skill for any nail technician who wants to produce strong, durable, and aesthetically pleasing acrylic nails for their clients. The apex provides structural support to the nail, preventing it from breaking under stress while creating an elegant and natural-looking curve.
Many novice nail technicians find this part of the process challenging, but with the proper technique and a clear understanding of its purpose, you can improve your skills. This guide will walk you through the essential steps and principles needed to achieve the perfect apex for acrylic nails, enhancing the aesthetics and longevity of your nail enhancements.
Understanding the Importance of the Apex
Before diving into the application process, let’s first explain why the apex is so essential for the structural integrity of an acrylic nail. The apex is the highest point of the nail, strategically placed over the stress area where the nail is most likely to bend or break.
Without a properly constructed apex, the nail will be flat and weak, making it susceptible to cracking and lifting, which can be frustrating for you and your client. A well-defined apex distributes pressure evenly across the entire nail, providing the strength needed for everyday activities so the enhancement lasts longer.
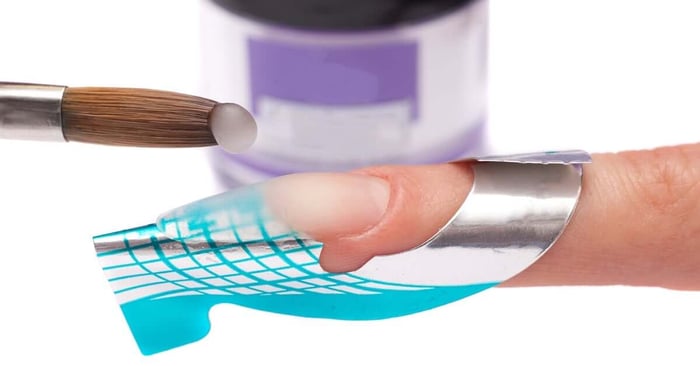
Preparing the Natural Nail for Application
Proper preparation of the natural nail is the foundation for a successful acrylic application, making it a step that should never be rushed or overlooked. Begin by gently pushing back the cuticles and removing nonliving tissue from the nail plate to create a clean surface for the product to adhere to.
Next, lightly buff the shine from the natural nail using a fine-grit file, being careful not to over-file or cause damage to the nail plate. Finally, cleanse the nail with a dehydrator and apply a primer for maximum adhesion. The primer will also prevent lifting issues later on.
Choosing the Right Brush and Monomer-to-Powder Ratio
A high-quality kolinsky brush in a size you’re comfortable with, typically between a size eight and 12, will allow for optimal bead pickup and placement. Achieving the perfect monomer-to-powder ratio is equally critical; you want a medium-wet bead that’s not too runny or too dry. A bead that’s too wet will run into the cuticles and sidewalls, while a bead that’s too dry will be difficult to manipulate and may result in a lumpy application.
The Three-Zone Application Method
A popular and effective technique for applying acrylic is the three-zone method, which divides the nail into distinct sections for a controlled and structured application. Zone one is the free edge, zone two is the middle of the nail where the apex will be, and zone three is the cuticle area.
By focusing on one zone at a time, you can build the nail’s structure methodically so that each location has the appropriate thickness and shape. This approach helps you maintain control over the product and prevents the acrylic from becoming too thick or uneven.
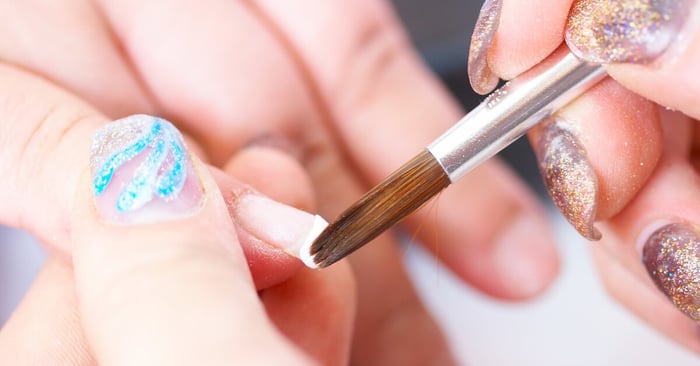
Building the Apex in Zone Two
Zone two is where the magic happens; this is the area where you’ll construct the apex to give the nail its strength and curve. After applying a thin layer of acrylic to the free edge in zone one, pick up a slightly larger bead of acrylic and place it in the center of the nail.
Use the body of your brush to gently press and guide the acrylic, building up the height in the stress area while feathering the product toward the free edge and the cuticle. Create a gentle slope from the apex down to the tip and a seamless blend into the natural nail. Check your application and the nail shape by viewing the nail from the side once the acrylic is set. You should be able to see a higher apex right at the center of the nail. If it’s too high or too low on the nail, correct with more acrylic; you can refine the results later with a nail file.
Refining the Cuticle Area in Zone Three
The cuticle area requires a delicate touch and a smaller bead of acrylic for a seamless, natural-looking transition. Place this small bead near the cuticle, leaving a tiny margin of space to prevent the product from touching the skin, which can cause lifting or overexposure of product to the skin.
Gently pat the acrylic into place, tapering it toward the cuticle and blending it smoothly with the product in zone two. A clean cuticle line is important, so take your time with this step.
Shaping and Filing for a Flawless Finish
Once the acrylic fully cures, it’s time to shape and refine the nail to perfect the apex and create a smooth, symmetrical surface. Use a 180-grit hand file to shape the sidewalls and free edge so they’re straight and even, which contributes to the overall structural balance.
Next, switch to a finer-grit hand file or electric file bit to smooth the surface of the nail, focusing on blending the apex seamlessly into the rest of the enhancement. The goal is to create a graceful curve that isn’t overly bulky, maintaining a slender appearance from all angles.
After filing, look at the nail from the side profile to check for a smooth, gradual curve from the cuticle to the free edge, with the highest point located over the stress area. View the nail from the client’s perspective. It should appear slender, not wide or bulky. Also, look down the barrel of the nail to check for a consistent C-curve, which adds to the nail’s strength and overall beauty.
The Importance of High-Quality Products
Using professional-grade products is nonnegotiable when you want to achieve consistent, beautiful results that your clients will love. Investing in high-quality acrylic nail products, from your monomer and powders to your brushes and files, will make a noticeable difference in your application process and the outcome.
Premium products offer better workability, superior adhesion, and enhanced clarity, allowing you to create enhancements with greater ease. By choosing reputable brands, you can provide a safe and durable service for your clients that reflects your commitment to excellence in your craft.
Applying Top Coat for Shine and Protection
The final step in achieving the perfect acrylic nail is applying top coat to seal your work and provide a brilliant, long-lasting shine. Top coat enhances the nail’s appearance and protects it from chipping and yellowing.
Apply a thin, even layer over the entire nail, making sure to cap the free edge. If you’re using a gel top coat, make sure to cure it under a UV or LED lamp according to the manufacturer’s instructions. Remove the sticky inhibition layer afterward with nail cleanser, if necessary.
Practice Makes Perfect
Creating a perfect apex takes time, patience, and consistent practice—so don’t be discouraged if your first few attempts aren’t the best. Each set of nails you create is an opportunity to refine your technique and improve your skills, especially as you work to achieve the perfect apex for acrylic nails.
Watch tutorials from experienced nail educators, attend workshops, and never be afraid to ask for feedback from your peers in the industry. With dedication and a passion for your craft, you’ll soon create beautiful, strong, perfectly structured acrylic nails that you’ll be proud to show off.