

Perfect sets start with a precise match between the natural nail and the tip. Anyone who has wrestled with overhang, pinching, or lifting knows how frustrating the wrong fit can be. Small mismatches create big problems later, from premature breaks to awkward shaping, and those results leave everyone dissatisfied.
Our quick guide simplifies the process and shows you how a thoughtful approach saves time, improves longevity, and elevates results. You’ll learn how to assess width, shape, and condition, then align those details with materials, sizes, and styles that enhance every hand. Most importantly, you’ll know exactly how to select the right tips for different nail beds and create a seamless, natural-looking base.
Assess the Natural Nail Shape
Width
Width dictates comfort, durability, and symmetry. Start by measuring from sidewall to sidewall at the widest point of the nail plate. A soft, flexible ruler or tip sizing card helps, though careful visual alignment can also work well with practice. The tip should meet both sidewalls without pressing into the skin or creating a gap at the center of the nail.
An oversized tip causes overhang and catches on clothing, while an undersized tip pinches and stresses the nail. Choose the size that reaches both sidewalls without forcing it. Slightly larger tips often fit better than smaller ones, since gentle filing can refine the contact points. A correct width also supports the apex and more evenly distributes structural stress, which reduces cracking and lifting over the life of the application.
Shape
A client’s natural nail shape determines the curve and style that will sit comfortably. Many clients have flat or gently curved nails, but you may also meet some with a more pronounced C-curve. A flat nail pairs best with tips that have a softer curve through the well area. A stronger C-curve benefits from tips with more pronounced curvature, which helps the sidewalls meet cleanly without gaps.
Tip shape also affects the overall look and wear. A square or coffin profile relies on balanced sidewalls, while round and stiletto shapes highlight length and taper. Matching curvature first ensures adhesion along the entire contact area. The result feels secure, files predictably, and forms a clean silhouette without stress points.
Condition
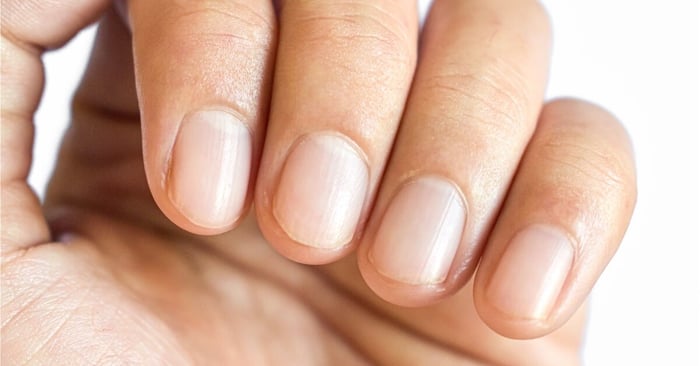
Nail health also plays a role in tip choice. Brittle or damaged nails need lighter stress and gentler contact, in which case flexible or thin-walled tips often perform best. Sturdy, healthy nails can carry more structure and length without causing further damage to the natural nail.
Materials vary in flexibility and density. Softer options help fragile plates, while durable systems support length and shape retention. Prep also matters here, since gentle etching, balanced dehydration, and careful pH control help weak nails perform better with enhancements. Avoid heavy pressure or aggressive filing, and keep weight distribution even through the stress area.
Types of Nail Tips
Material
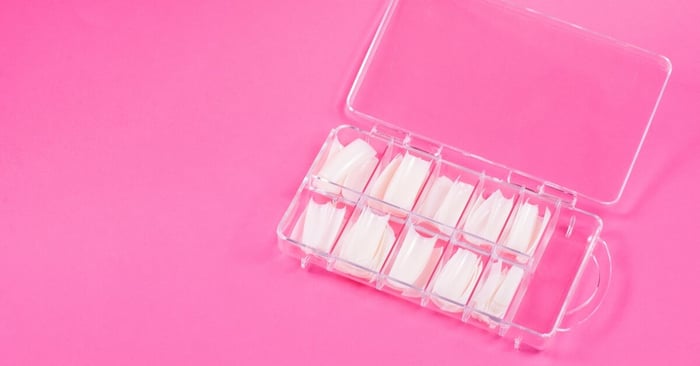
Plastic tips are lightweight and easy to apply, and they offer a solid base for a durable and reliable structure. They come in an assortment of sizes and lengths, which makes customization easy.
Plastic tips typically come with a well (an indented contact area) and well-less. Well tips are available with a full, half, and quarter well. This allows for greater contact area on the nail (particularly useful for nail biters) and results in better stability, particularly for those who have weak or flexible nails. However, you do have to blend down the tip so that it’s flush with the nail plate before applying the enhancement product.
Well-less tips, on the other hand, have no indent and can be placed at the very end of the natural nail. These are often a faster option because you don’t have to blend the tip. Additionally, they require less adhesive, so the majority of the nail strength comes from the acrylic or gel enhancement rather than the glue.
Full-coverage gel tips are the newest innovation and have become increasingly popular in nail services. These come in wearable and extended lengths and are pre-shaped, so all you have to do is adhere and polish. Full-coverage gel tips are applied with soft gel rather than traditional tip adhesive, flash-cured, then fully cured under an LED lamp. The flexible nature makes them easy to wear and doesn’t require additional acrylic or gel to create structure.
These types of tips also come in different colors, like pink, nude, and mauve, making application even faster because you don’t have to follow with a gel polish application. Apply the tips, add designs if desired, and you’re finished.
Shape
Any nail plate can support any tip shape, but some nail beds lend themselves more to certain shapes than others. Speak with your client about their nail goals and take your time when examining the shape of their nail bed so that you can make informed suggestions.
Size
Variety within a kit makes fitting faster and more accurate. Mixed-size boxes help you dial in the perfect contact on each finger, since widths can vary hand to hand.
Kits with wide ranges also support different nail bed lengths and curvature. Consistent sizing across a brand streamlines refills and reorders, saving you time and creating a more familiar experience for clients. Reliable sizing also means less forced filing and cleaner adhesion lines.
Application Techniques
Preparation
Prep sets the stage for long wear. Begin by cleansing the nails, pushing back cuticles, and removing any non-living tissue. Shape the free edge lightly and create a uniform canvas. A gentle buff removes surface shine without thinning the plate. Finish with proper dehydration and primer as recommended by the system.
A clean, smooth surface allows adhesive to bond evenly. Oil, dust, or leftover debris blocks contact and causes early lifting.
Adhesion
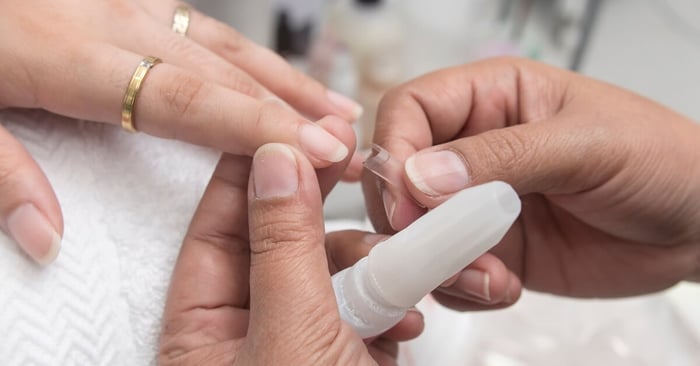
Adhesive choice should match the tip material and service goals. A thicker adhesive supports slight gaps on curved plates, while thinner formulas suit close, flat fits. Place a balanced bead or thin layer on the contact area, then apply the tip from the free edge toward the cuticle direction at a 45-degree angle, pushing down as you move.
Hold steady pressure until the adhesive is set. Air bubbles weaken the bond and lead to lifting at stress points. Wipe away any overflow, then check the sidewalls for full contact. Consistent placement ensures uniform wear across the set.
Blending
Seamless blending creates a natural transition. After the tip sets, refine the contact area with controlled, even strokes. Focus on the ridge where the tip meets the natural nail, keeping heat minimal and pressure light. A fine-grit file or an electric file with a soft-touch bit will enable you to achieve a smooth line.
Shaping should reinforce the apex, protect the sidewalls, and set the final silhouette.
Troubleshooting Common Tip Issues
Lifting
Lifting usually traces back to rushed prep, oil on the nail plate, or poor sidewall contact. Revisit cleansing, cuticle work, and thorough dehydration. Correct sizing also matters, since undersized tips pinch and break the seal. Gentle pressure during seating pushes out air and aligns the well for full contact.
A primer compatible with your system improves bond strength.
Cracking
Cracks appear where stress concentrates, often near the sidewalls or the thinnest part of the apex. Make sure to apply enough product at the apex for proper arch support along with a balanced build that supports the nail length.
Reinforce zones that flex frequently, and avoid overfiling the transition area. A well-placed apex spreads force evenly along the nail, preventing lines of weakness.
Uneven Application
Uneven placement leads to crooked tips and frustrating shaping. Start with a clear visual line down the center of the nail, then align the tip’s center with it before seating. Consistent adhesive coverage prevents tilt and hollow spots.
If a tip lands off-center, remove it immediately and start again rather than forcing a fix with filing. A clean reset preserves structure and symmetry with less effort.
Confident Finishes That Last
Thoughtful assessment and precise application transform results. The right width prevents overhang and pinching, while curvature alignment supports full contact along the well. Materials and shapes then elevate comfort and style, guided by the client’s goals, lifestyle, and nail health. With these steps, you can confidently select the right tips for different nail shapes and produce sets that look refined and wear beautifully.
Ready to stock up with products that perform every day? Visit Mia Secret for professional nail supplies and high-quality nail tips designed for efficient services and long-lasting results. Shop curated kits, reliable adhesives, and pro tools that streamline your workflow and enhance every set.