

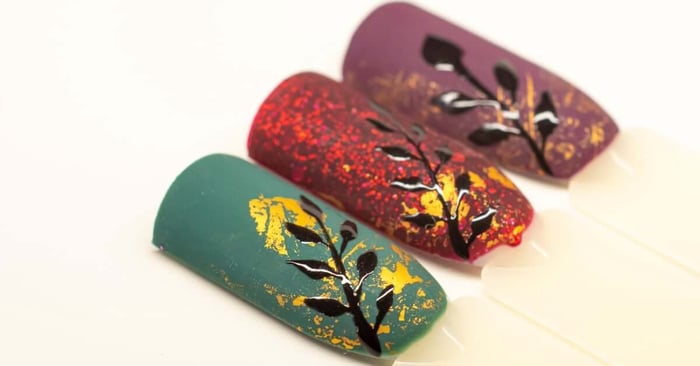

Transfer foils give nail artists a fast way to add metallic detail, printed patterns, and layered accents. This in-depth guide to using transfer foils in nail art covers product selection, application, design options, troubleshooting, and ways to combine foils with gel and acrylic systems.
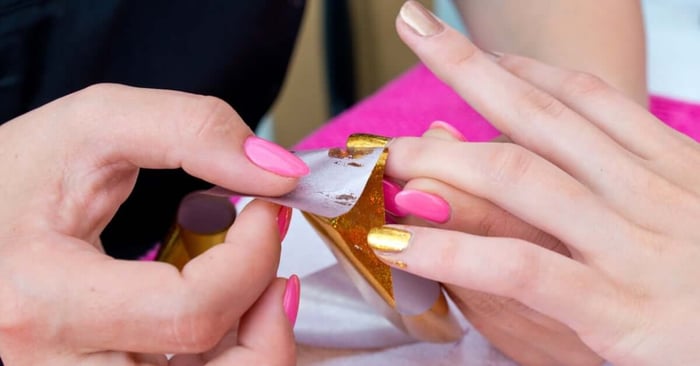
What Are Transfer Foils and How Do They Work?
Transfer foils are thin decorative films that impart color, metallic effects, or patterns onto the nail when pressed over a tacky surface. They are available in metallic, holographic, transparent, and printed finishes, making them useful for everything from subtle accents to full-coverage designs.
Unlike hand-painted nail art, transfer foil does not rely on brushwork to create detail; the design is already built into the foil itself. Once the foil makes contact with the correct adhesive layer, the decorative surface transfers onto the nail while the backing film is removed.
Because foil does not bond directly to a nail, the application process depends on creating the right amount of tackiness before the transfer takes place. Air-dry transfer adhesive and foil gel are two common ways to create that surface.
Choosing the Right Adhesion Method
A clean foil transfer starts with the right adhesive approach. Most foil applications rely on either an air-dry transfer adhesive or a foil gel cured under an LED lamp.
Air-dry adhesives create a tacky surface without requiring a curing step. Once the product dries, the foil can be pressed directly onto the nail. This approach works well for quick accent designs, salon services that prioritize speed, and at-home nail art.
Foil gels follow a slightly different process. The gel is applied where the foil should transfer, then cured according to the product instructions. After curing, the tacky surface is ready for foil placement. This method works particularly well for controlled placement, detailed shapes, and designs that require more precision.
Neither method is inherently better than the other. The choice often comes down to workflow, product preference, and the type of design being created.
How To Apply Transfer Foils Step by Step
The transfer process itself is relatively simple. Most foil issues come from uneven adhesive application, transferring too early, or failing to seal the finished design.
Follow this basic process:
- Apply your base color and cure if working with gel polish.
- Apply a thin layer of foil adhesive or foil gel where the foil should transfer.
- Wait for the adhesive to become ready for transfer according to the product instructions, then press the foil onto the nail and peel away the backing.
- Seal the finished design with no-wipe gel top coat or standard top coat if working with lacquer, and cap the free edge.
Use even pressure when pressing the foil onto the nail. A silicone tool, fingertip, or lint-free wipe can all work effectively. Avoid dragging the foil across the surface, as this can distort the transfer pattern.
If part of the design does not transfer completely, place the foil back onto that area and press again.
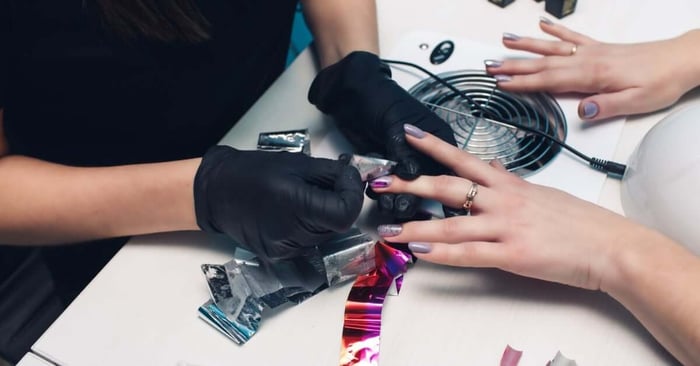
Different Ways To Use Transfer Foils in Nail Art
Transfer foils offer far more flexibility than simple metallic coverage. The same foil can create dramatically different effects depending on how it is placed.
Full-Coverage Foil
Full-coverage foil designs create a strong metallic or patterned appearance across the entire nail. This approach works particularly well with chrome-inspired finishes, holographic effects, and printed foil patterns. However, be wary: Transfer foil at the free edge can chip faster than gel color, even with a capped free edge.
Partial Transfers
Partial transfers create a different result. Instead of covering the entire nail, the foil is pressed only in selected areas. This technique leaves portions of the underlying color visible and creates a more textured appearance.
Abstract/Irregular Placement
Abstract placement is another common approach. Small foil sections can be scattered across the nail to create broken metallic accents over any color gel background. Because the transfer is intentionally irregular, the final design often appears more layered and dimensional.
Foil for Accents
Foils can also be used to highlight line work, geometric shapes, and graphic elements. By applying foil adhesive only where the design should appear, the metallic finish becomes part of the artwork rather than the background.
Common Transfer Foil Problems and Fixes
Even simple foil applications can produce inconsistent results when a few details are overlooked.
Use these adjustments when transfers are not behaving as expected:
- Correct patchy transfers by making sure the adhesive layer is fully ready before applying the foil.
- Reduce wrinkling by pressing the foil into place instead of sliding it across the nail.
- Prevent edge lifting by leaving room for top coat around the perimeter and sealing the free edge completely.
If a foil refuses to transfer at all, check which side of the foil is contacting the adhesive. Many transfer issues come from simply using the wrong side of the film on accident.
Combining Foils With Gel and Acrylic Systems
One reason transfer foils remain popular is their compatibility with different nail systems. They can be incorporated into gel manicures, acrylic enhancements and even regular nail polish.
Over gel nail polish, foils provide an opportunity to experiment with layering techniques and controlled placement. Artists can practice combining color, metallic accents, and top coat finishes without changing the structure of the nail.
Builder gel and hard gel systems open additional creative possibilities. Foils can be layered between clear gel sections, incorporated into encapsulated designs, or combined with pigments and glitter to create more complex effects. These techniques encourage skill development while expanding the range of designs that can be offered.
Acrylic systems create similar opportunities. Once the structure has been built and refined, foil accents can be added over color or incorporated into layered nail art concepts. Mixing foil with painted details, metallic effects, or transparent color layers can produce results that would be difficult to achieve with any single technique alone.
The more comfortable you become with foil placement and layering, the easier it becomes to create unique combinations that go beyond standard metallic accents.
Expand Your Nail Art Options With Transfer Foils
Transfer foils remain one of the most versatile nail art tools available because they combine speed, detail, and flexibility. A simple transfer can create metallic accents, patterned designs, abstract placement, or layered effects without requiring extensive hand-painting.
Whether you prefer air-dry adhesives, foil gels, metallic-effect gel colors, or a combination of techniques, the core process stays straightforward. Build the proper surface, transfer the foil cleanly, and seal the finished design completely.
As your experience grows, using transfer foils in nail art becomes less about following a single technique and more about experimenting with different finishes, materials, and design combinations.
At Mia Secret, we offer transfer foils, foil adhesives, foil gels, gel nail systems, and nail art products designed to support both everyday applications and more advanced creative techniques. Explore our professional nail supplies to expand your nail art options and build new foil-inspired designs.